Super Fast Throw Pillows - The Folding Method
- SeamsRightDesign
- Sep 30, 2019
- 2 min read
Updated: Oct 6, 2019
Ready for the FASTEST throw pillows ever? 2 cuts, 2 seams, 20 minutes!

The Basic Info You Need to Know
Fabric Requirements: 2/3 Yard per pillow
Fabric Suggestions: Thicker, sturdy fabrics. I.E. Flannels, Denim, Upholstery, Linen (cautiously), Corduroy, Twill, Broadcloth, Non-Stretch Velour/Velvet, Quilting Cottons... I mean, it's a throw pillow. Do what SEAMS RIGHT. BUT BEWARE OF KNITS AND SHEER FABRICS. They are NOT for this project.
Seam Allowance: 1/2"
Finished Pillow Dimensions: 19"x19"
Best Pillow Insert Dimensions: 20"x20"
HERE. WE. GO.
1. Fold your fabric in half with selvages (those finished edges of fabric) together. (Note this is typically how fabric comes off the bolt from the fabric store.)
PLEASE NOTE BEFORE CUTTING: You should NOOOOT be cutting off the selvage edges. Got it? Don't cut off your selvages! Don't make more work for yourself, ok? OKAY?!?
2. Cut #1: Straighten off your first raw edge. If you're working with a rotary cutter, ruler & mat - line up your fold on a line and cut at the nearest inch line. If you have fabric scissors and a ruler, grab a pen or chalk and draw a straight line where you plan to cut.
3. Cut #2 Measure down 20" from your straightened edge and cut another pretty edge.

4. Use some pins to mark the halfway point between your selvages. Pin on top and bottom. Unfold your fabric with the right side of your fabric facing up. Measure and pin 9 1/2" to the left and right of your center point.
Check the pictures on this and the next few steps to help clear up confusion.

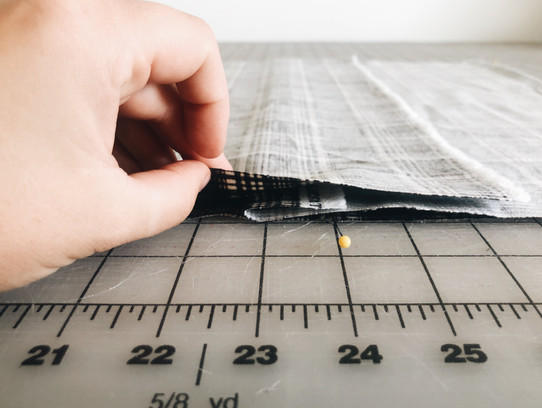
5. Grab one selvage edge and fold it over at the 9 1/2" mark. Now fold it back 1 1/2" (to hide that unsightly selvage edge) and pin well.

6. Fold your second selvage edge over at the 9 1/2" pins and pin well.
A note on the back overlap: 4"-6" ish is ideal. Less than that you pillow will come poking out and much more than that it becomes tough to get your pillow in altogether. Bottom line is maximize the width of your fabric as best as you can and if it SEAMS RIGHT it is good enough!
7. Sew both sides with a 1/2" seam allowance. Finish the edge with zig zag stitch, overlock stitch or SERGER if you have one. This strengthens your seam and prevents fraying.
8. Flip right side out, press in your creases and stuff in that pillow!
Pro Tip: Fill that sucker with a 20x20 down-filled, CHOPPABLE (is that a word?) pillow insert. We recommend this Ikea one that costs a whopping 6 bucks. You can't go wrong!

If you're using Plaids or Obvious Stripes: Line those suckers up BEFORE you cut. No sloping lines here!!
We can't wait to see your gorgeous, beautiful pillows! Make sure to tag us on Instagram and let us know how they came together!!


Comments